All of these essential are from Walmart.


DIY 2: Crystals


Now I know that for me personally, when ever I see crystals I just want one so bad, so when I found out that you can make one I got so pumped.


DIY 3: Desk/Side Table organization crate.


Okay so this DIY is super easy, and also my favorite DIY, basically it is something that you are going to be putting on your desk or your side table thats by your bed, and its just going to make your room super cute, and make it more organized.


Seriously the cutest DIY, and the easiest. Your just going to then put what ever you want on your new little desk organization. I put a plant from Ikea on mine, a mirror also from Ikea, my DIY crystal, and this little sliver cow like thing, and I just think that everything looks perfect now and yeah thats it!
What you are going to need:
- Agate prints
- Cardboard
- Elmers glue
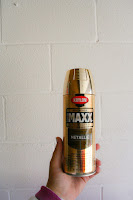
- Gold spray paint
- Scissors
- Hot glue gun
- Mod podge
- Sea Salt
- Food coloring
- Elmers glue
- Bowl & Spoon
- Some sort of shelf or wood box (crate)
- Paint
- Paint brushes
DIY 1: Agate Costers
Alright so for this first DIY you are going to need,
- Scissors
- Mod Podge
- Hot glue gun (optional)
- Agate prints
- Cardboard
- Elmers glue
- Gold spray paint
- Paint brush


STEPS:
1.Cut out your Agate print.

2. Trace the Agate print onto your cardboard, and then cut it out.


3. Now this next part I made up, just because I think it looks nicer, but it is completely optional, but I think that it just makes the coaster look a little better, you are going to put hot glue on the ends of the cardboard cut out (as shown in the picture), and this is just going to make it look rounder and a little more professional.


4. Take your cut out cardboard and your going to spray paint it gold (both sides)

5. Once your cardboard is dry, take your Elmers glue, and glue the Agate print onto your cardboard.

6. Now with a fairly big paint brush, apply the Mod Podge on the top of your coaster and don't worry about putting it on there think.


7. Let it sit and dry awhile, and then there you go! You now have an adorable coaster that TOTALLY works. I really love this DIY it really just adds so much color to your room and its super easy!
You are going to need:
- Sea Salt
- Elmers glue
- Bowl & Spoon
- Food coloring


Now I know that for me personally, when ever I see crystals I just want one so bad, so when I found out that you can make one I got so pumped.
STEPS:
1. In your bowl you are going to put in quite a lot of glue.

2. Next put in about one drop of food coloring.

3. Start to poor in the sea salt, but do it quickly because it dry's fast.


4. Take your hands, and shape it the way you want.


5. Let the crystal dry for a whole day.
6. (Optional) After that if you want you can spray paint the bottom of the crystal gold, I didn't but you totally can.
7. There you go! Now you have a super cute crystal that you made all by yourself!
DIY 3: Desk/Side Table organization crate.
You will need:
- Wood crate
- Paint (Pause, can I just point out that I got this super cute color for only $0.50, It is just AWSOME!)
- Paint brush


Okay so this DIY is super easy, and also my favorite DIY, basically it is something that you are going to be putting on your desk or your side table thats by your bed, and its just going to make your room super cute, and make it more organized.
STEPS:
1. Take your paint and put it on a plate or I used a piece of wood, which actually made a little bonus DIY which I will show you at the end.

2. Apply the paint to the rim of the crate.

3. Let that dry, and your done!
I hope your guys liked this post, I really had a good time doing it. Like i've said before, I love doing craft like things. It also just makes me feel like I have done a lot to your room, and It just look super cute.
Bonus DIY:

1. So with that little block that we used to put the paint on, you are just going to spread the paint on one side of the block.

2. Then you are going to spray paint the other 5 sides gold.
3. Let it dry for about a 30 minutes, and there you go.
So I do my hair on my desk most of the time, and I usually straiten my hair, and I don't want the straightener to put burn mark on my desk so, i'm going to take my block and whenever I do my hair i'm going to put the straightener or curler on that block, so there is going to be NO burn marks.
I luv you guy and if you recreated any of these DIY's make sure that you show me because that would be really awesome.
My social medias:
Instagram: instagram.com/swedishsue
Instagram: instagram.com/swedishsue
Snapchat: swedishsue or Suzy Ahlman
Pinterst: pinterst.com/swedishsue
Twitter: twitter.com/suzyahlman
Thank you Summer for taking these pictures for me:
Follow Summer on:
Instagram: instagram.com/summmerwalk
Twitter: twitter.com/summmer_walk
And also thank you to my mom for taking some of the pictures as well:
Follow her on:
Instagram: instagram.com/chrysalispreschool
xoxo,
Sincerely, Suzy Ahlman, Swedish Sue.